Introduction to Insect Collection
![]()
Insects are invertebrates with three pairs of legs, usually two pairs of wings, one pair of antenna, jointed appendages, and three distinct body regions — head, thorax, & abdomen. Insects belong to the largest phylum of animals known as arthropods. Many small arthropods are mistaken for insects such as spiders, ticks, millipedes, & centipedes. Although some insects may sting or bite, insects play an important role in nature as a food source for other animals and as plant pollinators.
By doing an insect collection, you can, not only learn beneficial and harmful insects common to your area, but you will also learn structural modifications of various insects that have enabled them to survive & become such a successful and diverse group of animals.. With your insect collection you will also learn to use taxonomic keys to identify organisms.
In order to properly do an insect collection, several techniques must be learned including how to correctly collect, kill, pin, spread, label, and display your organisms. The following instructions have been modified for a high school biology classroom.
![]()
Materials needed for collecting:
- insect net
- several kill jars with killing agent (nail polish remover works)
- notebook
- pencil
- tweezers
- several clean baby food jars (these will be holding jars)
- equipment bag
How to make an insect net: 
- Bend the triangular part of a wire coat hanger until it forms a circle.
- Carefully straighten the wire hook.
- Sew netting, cheesecloth, or sheer curtain material to form a bag with a tapering end.
- Sew a hem at the top end of the bag leaving an opening for the wire hanger.
- Thread the wire hanger through the hem of your bag & then twist the wires together.
- Use plenty of heavy gray tape to tape the twisted wire securely to the end of a broom handle or wooden dowel.
How to make a kill jar:
- Use a clean, glass jar with straight sides.
- Write a poison label and tape this to the front of the jar with clear tape..
- Tape the bottom of the jar with heavy gray tape to protect it from breaking if it is dropped.
- Place a 2″ – 3″ layer of cotton balls in the bottom of the jar.
- Cut a piece of corrugated cardboard the same diameter as the inside of the jar to fit over the cotton balls.
- Carefully punch several small holes in the cardboard with an ice pick.
- Charge the jar by adding polish remover to the cotton balls.
- Immediately place the cardboard circle on top of the cotton balls & place the lid on the jar.
- Keep the inside of the jar moisture free so insects won’t discolor & replace the cotton & cardboard as needed.
Remember to recharge the jar periodically if insects do not seem to be dying as fast and never leave the lid off of your jar.
Collecting: 
Insects are found almost everywhere so look for them on plants, in water, in soil, under rocks, in rotten logs, around lights at night, etc. Your collection will consist 0f 20 insects for Biology I and 30 insects for Pre-AP Biology. Collect only adults in perfect condition to receive credit. As you collect insects, be sure to record the name of the insect or a good description, the date collected, and the place each insect was collected in your notebook. Use different kill jars for butterflies and beetles and never put too many insects in the same kill jar. Once your insect is dead (not just knocked out), use tweezers to transfer them to a small baby food jar until you arrive home to pin it. Don’t leave the insects in these holding jars more than a few hours and never leave insects in kill jars more than 3 to 5 hours because of their brittle bodies. most insects will die within 30 minutes to one hour in a charged newly charged kill jar.
When collecting stinging insects, invert the net once the insect is captured and allow the insect to crawl to the tapered end of the net. Carefully grasp the net above this tapered end, open the kill jar, and put the tapered end of the net with the insect inside the jar. Lay the lid back on top of the jar until the insect is “knocked out”. Remove the lid and lift out the net with the unconscious insect. Turn the net back over, shake the insect into the jar, & replace the lid until the insect finishes dying. If you are allergic to certain insect stings, have another student collect this insect for you.
![]()
Materials for mounting & labeling:
- tweezers
- Elmer’s glue
- insects pins
- card points
- insect labels
- spreading board
- pinning block (optional)
- straight pins
- index cards
- scissors
- black ink pin
- pencil
- several small vials
- shoebox with Styrofoam in the bottom
- notebook
- paper towels
Pinning insects:
See your insect notebook for pictures of the proper placement of insect pins through the body of different orders of insects.
- Hold the insects by its sides using your thumb & forefinger and firmly push the insect pin through the dorsal or top surface of the insect. The pin should be at a right angle to the insect’s body.
- Beetles are pinned near the front margin of the right wing near the midline
- Grasshoppers are pinned to the right of the prothorax
- True bugs are pinned to the right of the scutellum
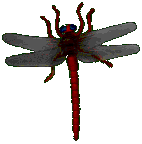
- Butterflies, moths, dragonflies, & damselflies are pinned through the middle of the thorax
- Most other insects are pinned through the thorax to the right of the midline
- Place insects on insect pins so their body is horizontal to the pinning surface or Styrofoam.
- Gently push the insect within at least 25mm from the top of the pin so that you can pick up the pin without touching the insect. Make sure all pinned and card pointed insects in your collection are at the same height on the pin. Two labels will be added below the insect’s body later.
- If the abdomen sags, place a small piece of index card below the body on the pin until the insect’s body dries and then remove the card.
- Insects with extremely long legs like crane flies or curved antenna & abdomens like ichneumon wasps should be placed on their left side and pinned through the right side of their body in the area of the thorax.
OOPS! My insects got too dry to pin or How to relax insects:
It is always wise to pin insects the same day that you collect them because if they dry completely, then they must be relaxed before pinning.
- Use a plastic container with a tight fitting lid, and add a layer of sand to the bottom of the container.
- Moisten the sand and add a few drops of carbolic acid to prevent molding.
- Place a paper towel on top of the sand and lay insects on the towel.
- Replace the lid and allow to re-hydrate for 1-3 days.
- Insects without hairy or scaly coverings such as beetles & grasshoppers, may be dropped into hot (just simmering) water for a few moments to relax them. If specimens are left in the water too long they will ruin!
What do I do with insects too soft to pin? 
- All soft bodied insects such as mayflies, stoneflies, & termites along with fleas must be kept permanently in preserving fluid in vials.
- Use clear, glass vials with tight fitting lids.
- Place only one type of insect in each vial and add enough alcohol to cover the insect and the identification labels which will be place inside the vial.
- Write vial labels in pencil, not ink!
- Place the blank sides of the 2 labels together before dropping them down into the vial so they can be read more easily.
What if the insect is too small to pin & not soft bodied? (card pointing):
- Insects too small to be pinned should be mounted on a card point.
- Card points are small triangular pieces of white cardboard through which a #3 insect pin is placed.
- Points are made using a point punch. Obtain these points from your teacher.
- Lay specimens to be mounted on their left side on paper towel. The insect’s right side should be up towards you!
- Place a # 3 pin through the broad end of a card point. This is easier if you lay the point on a plastic lid so it doesn’t bend when you thrust the pin through the card point!
- Use tweezers to bend the very tip of the card point downwards.
- Place a small amount of Elmer’s glue on the paper towel and then touch the bent tip of the point to the glue.
- Touch and hold this bent tip with its glue to the right side of the thorax of your insect. Hold the tip to the insect for at least one minute.
- Set the pin up into Styrofoam making sure the glue is dry & the insect’s body is parallel to the pinning surface.

Spreading butterfly & moth wings:
To prevent butterflies & moths from drying out before wing spreading, place them in small plastic bowls in the freezer. Be sure to tell your mom!
- Wings of butterflies and moths are spread to show venations & markings.
- Spreading boards can be bought or made out of Styrofoam or wood to spread wings. The top surface of the board is smooth with a slight upward slant and a central groove. The groove should provide a “snug” fit for the insect’s body & contain a strip of soft material into which insect pins can be placed.
- Pin the butterfly or moth as describe in the section on insect pinning.
- Cut 2 long, narrow strips of index card to hold down the wings when they are spread.
- Place the insect pin into the soft material in the central groove of the spreading board so that the insect’s wings are level with the pinning surface.
- Place a straight pin on either side of the insect’s body in the groove so it won’t turn when you start spreading.
- Place a strip of the index card over each wing and use 2 straight pins to secure each strip to the board. Be sure to not pin through the wing!
- Never touch your fingers to the upper surface of the wing as scales will be removed. Always hold or touch this index card strip when spreading the wing.
- Use another straight pin to help move the left front wing forward. Place the pin behind the large vein in the forewing up close to the body and gently pull this wing forward until its back edge is at a 90 degree angle with the body. Still holding your fingers on the cardboard strip, place a second straight pin through the strip (not the wing) up close to the front edge of the wing.
- In the same manner move the hind wing forward until a small portion of the hind wing is overlapped by the fore wing. Use 2 more straights pins to secure the back edge of the cardboard strip. Again, be sure to not pin through the wings!
- Repeat steps 8 – 11 for the right wings of the insect.
Some insects such as the Carolina locust also have unusual markings on their under wings, so only the right side of these insects should be spread!!!
- Allow the wings to dry for several days and then remove the strips, add your labels, and place the insect in your collection.
![]()
Writing insect labels:
- Each insect will have 2 labels on the pin below the insect’s body. The top label will be the identification label and the bottom label is the location & collector label.
- Obtain labels from your teacher and use black ink only for writing the labels unless placing them in alcohol vials.
- The identification label is the top label on the pin below the insect’s body. It should have the scientific name (genus & species) of the insect on the top line, then the common name of the insect, and the insect’s order on the bottom line. Remember to capitalize the genus & order and to underline the scientific name!
- The location label goes in the same direction on the bottom of the insect pin. The location the insect was collected should be written on the top line, then the date the insect was collected, and the name of the collector on the bottom line. If the collector has a long name, you may write their first initial and their last name.
- Be sure there is enough room between labels so that both can be read.
- Labels should be placed on the pin parallel to the body of a pinned insect or parallel to the point if the insect is card pointed. Be sure that all labels are readable from the right side when the insect’s head is pointing away from you!!!!
![]()
Collection Requirements:
Pre-AP Biology is required to collect 30 insects with a minimum of 12 insect orders
Biology I is required to collect 20 insects with a minimum of 10 insect orders
The following 8 orders are required of all biology students:
- Lepidoptera (butterflies & moths)
- Coleoptera (beetles)
- Diptera (flies & mosquitoes)
- Homoptera (cicadas & hoppers)
- Orthoptera (grasshoppers, crickets,…)
- Isoptera (termites)
- Hymenoptera (bees, ants, wasps)
- Hemiptera (true bugs)
Click here for additional orders
Materials needed to display insects:
- insect case with lid
- index cards
- ribbon, yarn, or string
- scissors
- black ink pen
- straight pins
- preserved insects (pinned, pointed, & in vials)
![]()
Displaying insects:
Remember that your insect collection will not be returned to you, so do not build an expensive case. Sturdy cases can be made out of 2 cardboard bottoms for cola six packs!
- Cases should be no more than 35 by 55 cm in size. All cases must be sturdy with a lid that can be easily opened for grading. Remember that the cases will be stacked when you turn them in to me!
- If the collection has a clear lid, it must be made of plastic and not glass.
- Place a sheet of Styrofoam in the bottom of your case .
- Make a label from an unlined index card for the center of your case. This label should contain your full name, subject, class period, date the collection was turned in to the teacher, number of orders, and number of insects in your collection. Use straight pins to attach this center card to the Styrofoam.
- Cut several small pieces of index card for order labels, and use your black ink pen to write the name of each order you have in your collection on these.
- Arrange insects in the case by order and in rows by descending size (largest to smallest). Use straight pins to attach the correct order label to the Styrofoam at the top of each row.
- Spread out the orders and insects so there are no empty spots in your case.
- Cut pieces of yarn or ribbon to separate the orders from each other, and again use straight pins to attach them to the Styrofoam.
- Make sure that all pinned insects are facing the front of your case!
- Make sure all identification and collector labels on pins are readable form the right side of the case!!